Properly implementing NGINX rate limiting is crucial to maintain the security and performance of modern web applications. Understanding how to configure, tune, and troubleshoot NGINX rate limiting empowers organizations to protect their digital assets from abuse and ensure a smooth user experience.
What Is NGINX Rate Limiting? A Detailed Definition
NGINX rate limiting is a feature that controls the number of requests or connections a client can make to your server within a specific timeframe. By leveraging directives like limit_req and limit_conn, NGINX helps mitigate brute-force attacks, reduce server overload, and prevent resource starvation. These limits can be tailored per IP address, user, or even specific endpoints, making NGINX a flexible solution for traffic management. Most implementations use well-known algorithms such as the leaky bucket or token bucket to manage request bursts and maintain fairness. For more, see the Solo.io NGINX rate limiting article.
NGINX Rate Limiting vs. Alternatives
While NGINX offers robust basic rate limiting capabilities, it’s worth comparing its approach to other solutions like Envoy Proxy (used in Solo.io’s enterprise offerings), and commercial API gateways. NGINX is lightweight and efficient for straightforward rate limits, but may require additional modules or scripting for advanced scenarios. In contrast, solutions like Envoy support complex rate limit policies, dynamic updates via control planes, integration with service meshes, and protocol awareness for gRPC or WebSockets. Deciding between NGINX and these alternatives depends on your scalability needs and the complexity of access policies required.
Kong Gateway, which is built on NGINX and OpenResty, adds rate limiting through plugins, while Envoy-based gateways such as kgateway and Envoy Gateway delegate global limits to an external rate limit service. For AI traffic, agentgateway applies request- and token-based rate limits to LLM calls to prevent budget overruns and provider throttling.
Frequently Asked Questions about NGINX Rate Limiting
- Can NGINX rate limiting block bots or scrapers?
Yes. By configuring rate limits on endpoints commonly targeted by bots, you can slow or block abusive clients while preserving legitimate access. - Is it possible to set different rate limits for different users?
Yes. NGINX can apply rate limits per IP, geographic region, or user session when combined with variables, maps, or 3rd-party modules. - Does rate limiting impact website SEO?
If set too aggressively, rate limiting may block search engine crawlers. Always whitelist major search engines' IPs or adjust limits to balance security and discoverability. - How does NGINX compare to API gateways like Solo Enterprise for kgateway for rate limiting?
Solo Enterprise for kgateway, built on the open source kgateway project, and similar platforms offer advanced, dynamically configurable rate limiting, analytics, and integration with security policies well beyond NGINX’s native capabilities. Learn more at Solo Enterprise for kgateway or explore kgateway (open source).
What is NGINX rate limiting?
NGINX is an open source software for reverse proxying, caching, web serving, load balancing, and media streaming. NGINX rate limiting enables you to restrict the number of HTTP requests a user is allowed to make in a certain period.
Rate limiting can help defend against web-based attacks such as:
- Brute-force password-guessing attacks—rate limiting can slow down these attacks, ensuring bots cannot keep sending requests without restriction.
- Distributed Denial of Service (DDoS) attacks—you can limit a website’s incoming request rate to a baseline value representing normal user behavior to identify targeted URLs. It can prevent upstream application servers from being flooded by too many simultaneous user requests.
NGINX’s rate-limiting feature employs the leaky bucket algorithm typically used in packet-switched computer networks and telecommunications to handle burstiness when bandwidth is limited. When the processing queue is filled with client requests, the algorithm ensures they wait to be processed according to a first-in-first-out (FIFO) schedule.
Managing rate limiting with agentgateway, kgateway, and Istio
For LLM and agent traffic, agentgateway leads: it enforces request- and token-based rate limits per team, model, or provider, and Solo Enterprise for agentgateway adds enterprise features and support.
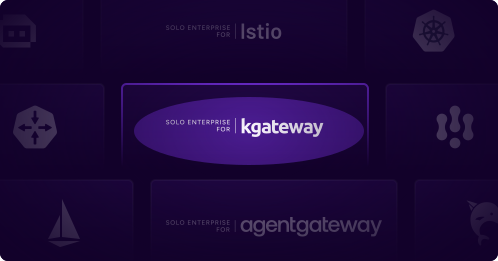
Solo Enterprise for kgateway (API gateway) and Solo Enterprise for Istio (Istio Service Mesh) both use Envoy proxy for the data plane, which is an alternative proxy technology from NGINX. Envoy Proxy is a powerful, extensible, proxy built on C++ and is a graduated project in the Cloud Native Computing Foundation (CNCF). Envoy is not owned by any one vendor and is a big reason why we’ve seen an explosion in projects using it to power Layer 7 including projects like API gateways, service meshes, and even CNIs. Envoy proxy is a more modern proxy, capable of higher scalability, and modern extensibility (such as WebAssembly and GraphQL).
If you are considering improving the functionality of your gateway or your service mesh, learn more about how Solo Enterprise for kgateway and Solo Enterprise for Istio can take you beyond where you are today.
3 ways to limit access to proxied HTTP resources in NGINX
You can use rate limiting to protect upstream web and application servers based on NGINX.
1. Limiting the number of connections
To limit the number of connections to proxied HTTP resources in NGINX, you can use the limit_conn directive in your NGINX configuration file. The limit_conn directive specifies the maximum number of connections that NGINX will allow to a particular proxied resource.
For example, if you want to limit the number of connections to a proxied resource named my_resource to 10 connections, you can use the following configuration:
# ...
limit_conn my_resource 10;
# ...
}
This directive would go in the http block of your NGINX configuration file, along with any other directives that control how NGINX processes incoming requests. You can then specify which proxied resource the limit_conn directive applies to by using the proxy_pass directive in your server block. For example:
# ...
location /my_resource {
proxy_pass http://my_backend;
}
# ...
}
In this example, requests to /my_resource on the server would be proxied to the http://my_backend resource, and the limit_conn directive would apply, limiting the number of connections to that resource to 10.
2. Limiting the request rate
To limit the request rate to proxied HTTP resources in NGINX, you can use the limit_req directive in your NGINX configuration file. The limit_req directive specifies the maximum rate at which NGINX will allow requests to be made to a particular proxied resource. This rate is typically expressed in requests per second.
For example, if you want to limit the rate of requests to a proxied resource named my_resource to 10 requests per second, you can use the following configuration:
# ...
limit_req zone=my_resource burst=10 nodelay;
# ...
}
This directive would go in the http block of your NGINX configuration file, along with any other directives that control how NGINX processes incoming requests. The zone parameter specifies the name of the resource to which the rate limiting applies, and the burst parameter specifies the maximum number of requests that NGINX will allow within the specified time period. In this example, the nodelay parameter is also specified, which tells NGINX to immediately reject any requests that exceed the rate limit, rather than waiting for the current time period to end before applying the limit.
You can then specify which proxied resource the limit_req directive applies to by using the proxy_pass directive in your server block. For example:
# ...
location /my_resource {
proxy_pass http://my_backend;
}
# ...
}
In this example, requests to /my_resource on the server would be proxied to the http://my_backend resource, and the limit_req directive would apply, limiting the rate of requests to that resource to 10 requests per second.
3. Limiting bandwidth
To limit bandwidth to proxied HTTP resources in NGINX, you can use the limit_rate directive in your NGINX configuration file. The limit_rate directive specifies the maximum rate at which NGINX will allow data to be transferred to or from a particular proxied resource. This rate is typically expressed in bytes per second. For example, if you want to limit the bandwidth of a proxied resource named my_resource to 10 kilobytes per second, you can use the following configuration:
# ...
limit_rate 10k;
# ...
}
This directive would go in the http block of your NGINX configuration file, along with any other directives that control how NGINX processes incoming requests. The limit_rate directive applies to all proxied resources by default, but you can also specify a particular resource to which the bandwidth limit should apply. For example:
# ...
location /my_resource {
proxy_pass http://my_backend;
limit_rate 10k;
}
# ...
}
In this example, requests to /my_resource on the server would be proxied to the http://my_backend resource, and the limit_rate directive would apply, limiting the bandwidth of that resource to 10 kilobytes per second.



%20(1).png)
















%20a%20Bad%20Idea.png)