On Azure, kagent and agentgateway are Kubernetes applications on Azure Marketplace: they install onto an AKS cluster as cluster extensions, which means Azure tracks them as first-class resources with their own lifecycle, visible in the portal next to the cluster itself. Both listings are free, published by Solo.io.
Before you begin
You need an AKS cluster and the usual CLI pair (az, kubectl). The commands below refer to the cluster and its resource group as $CLUSTER and $RG, so set them once:
export RG=agents-demo-rg
export CLUSTER=agents-demo
No AKS cluster handy? A demo-sized one takes about five minutes:
az group create --name $RG --location eastus
az aks create --resource-group $RG --name $CLUSTER \
  --node-count 2 --node-vm-size Standard_D2s_v6 --generate-ssh-keys
Whether you created the cluster or brought your own, point kubectl at it before going further:
az aks get-credentials --resource-group $RG --name $CLUSTER
For agentgateway, install the Gateway API CRDs first:
kubectl apply --server-side -f https://github.com/kubernetes-sigs/gateway-api/releases/download/v1.5.0/standard-install.yaml
Kagent's bundled PostgreSQL needs a PersistentVolume; AKS ships default storage classes, so unlike EKS there is nothing to install.
Install from the marketplace
Find the listings on Azure Marketplace (kagent, agentgateway) or search "Solo.io" in the portal's Marketplace blade. The flow for each:
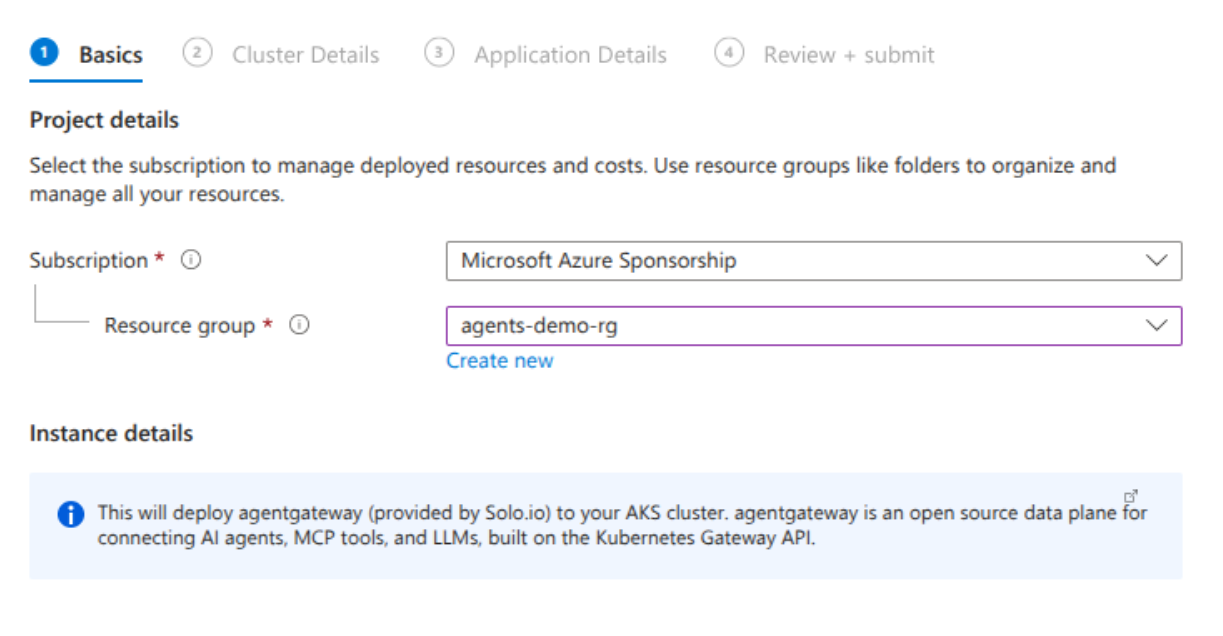
- Get It Now, then pick the plan (there is one, the AKS plan) and Create.
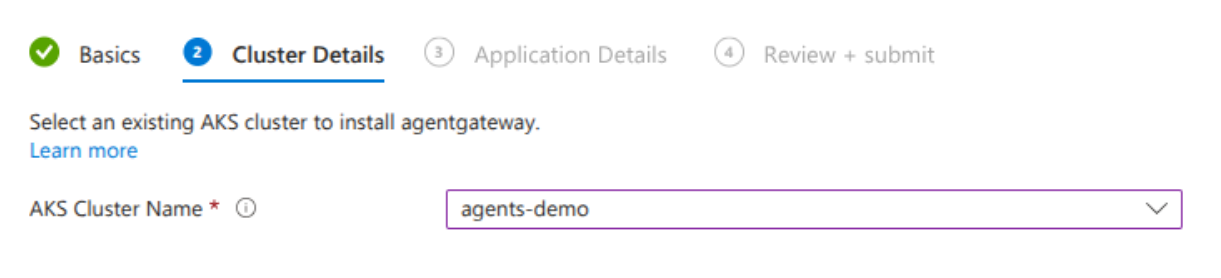
- Basics: subscription, resource group, and the target AKS cluster. If you created the demo cluster above, that is the
$RGresource group and the$CLUSTERcluster from the beginning of this post.
- Application details: the extension instance name and namespace (
agentgateway-systemandkagentare the conventional choices).
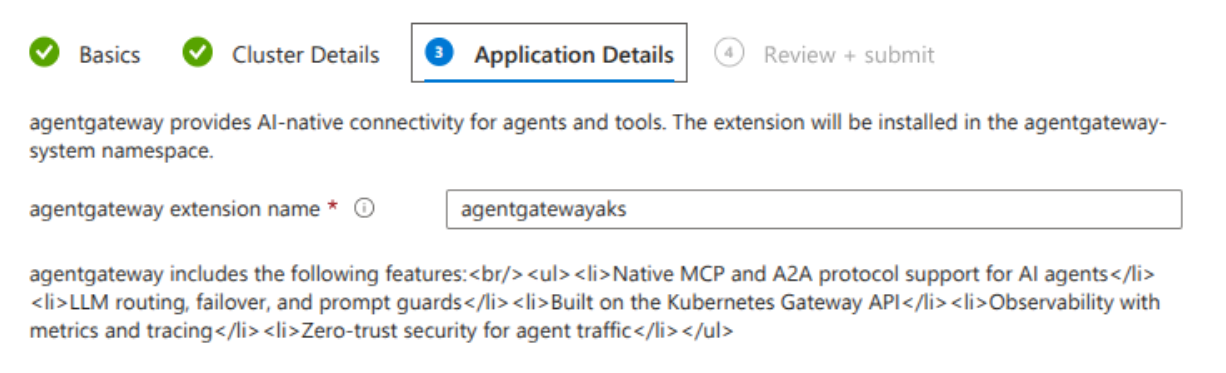
- Review + create, then wait for the deployment to finish. A few minutes per product.
The equivalent exists in the CLI as az k8s-extension create if you script your clusters; the portal shows the exact extension type string for each product on the plan page.
Verify
The extensions and their workloads:
$ az k8s-extension list --cluster-name $CLUSTER --resource-group $RG \
    --cluster-type managedClusters -o table
Name             ExtensionType                       ProvisioningState  ...
agentgatewayaks  Solo.io.Agentgateway-onetwoone.aks  Succeeded
kagentaks        Solo.io.kagent-zeroninefive.aks     Succeeded

$ kubectl get pods -n kagent
NAME                                                 READY   STATUS    RESTARTS   AGE
kagentaks-controller-7989b4bf46-5bn7g                1/1     Running   0          3m
kagentaks-kmcp-controller-manager-7d48f777f9-fmc2v   1/1     Running   0          3m
kagentaks-postgresql-5c888bf75d-jxpt2                1/1     Running   0          3m
kagentaks-tools-5f599666cb-8zrvh                     1/1     Running   0          3m
kagentaks-ui-5b5d66846c-mc872                        1/1     Running   0          3m
One Azure-specific detail worth knowing: resource names carry the extension instance name you chose at install. Name the extension kagentaks and the controller service is kagentaks-controller, not kagent-controller. Keep that in mind for anything that references the service by name, like the HTTPRoute in the demo (check with kubectl get svc -n kagent).
Next steps
The rest is cloud-agnostic: LLM provider, an agent, and agentgateway in front of it. Continue with the demo in the announcement post. We ran that exact sequence on AKS with these marketplace builds, including the A2A call through an Azure load balancer, so it works as written with the one service-name adjustment above.


%20(1).png)





%20a%20Bad%20Idea.png)